QM Product Spotlight
Grinder control gage
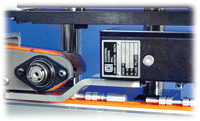 Precise statistical size
control of centerless ground parts is available
through use of an in-process gage mounted to a dual
belt gage conveyor. A driven top guide that is
mechanically synchronized to conveyor speed captures
and controls the part as it is driven through the
gage. The driven top guide features a polyurethane
belt which provides driving force to move the part
through the gaging station while avoiding any
possibility of marring the part as it is measured.
Statistical grinder control works to reduce grinding
costs by analyzing real-time part data for reliable
closed loop automatic operation.
Control
Gaging Inc.,
Infrared touch probe
 TS 440 model 3D touch trigger probes
are offered in as small a size as 0.49 mm x 63 mm
and with 360 degrees transmission. The small
dimensions make the infrared probe ideal for
machines that are carrying out repeated setup and
inspection proc edures and have limited working
space. Heidenhain also offers a new transreceiver
for the infrared touch probes, the SE 540, which is
designed for installation in the headstock to move
along with the touch probe. This ensures a reliable
transmission of infrared signals at any position of
the machine"s working space and an advantage with
large machines and those whose spindles move in two
separate working spaces.
Heidenhain Corp.,
Snap gage
 The SSG series of snap gages is
available in 1" increments from 0 to 1" through 23"
to 24". The anvil comes with 0.06" gaging travel and
the measuring pressure can easily be adjusted. The
flat and parallel 5/8" square carbide contacts have
a generous lead radius that protects the parts
during loading. Other anvils include interchangeable
blade anvils in widths of 0.04", 0.06", 0.08", 0.1",
and 0.125". Special contact configurations are
available to check other features such as pitch
diameter and major diameter. Options such as
retraction and bench stands are offered.
Dorsey
Metrology International,
Receiver for NDT testing
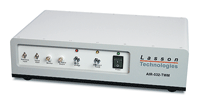 The AIR-532 Laser Ultrasonic Receiver
is for component inspection and non-destructive
evaluation of material properties. Common
measurement applications include pipe and tube wall
thickness, weld inspection and dimensioning,
inspection of electronic packages, and general
defect location and characterization. The AIR-532
utilizes Lasson"s proprietary photorefractive
technology and features shock-mounted optics for
improved stability, fiber coupling to a selection of
compact sensor heads, and a new chassis designed for
benchtop use or compatibility with standard 19" rack
mount industrial cabinets. Two versions of the
AIR-532 are available: the AIR-532-TWM for
laboratory measurements and the AIR-532-EMF
(Electro-Motive Force) for industrial environments.
Lasson
Technologies Inc.,
Measure and inspect tools
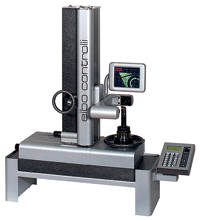 The E-450 presetter by Elbo Controlli
offers the latest technology for accuracy in tool
measurement and inspection. The E-450 features a
ground granite column and base, a spindle body
assembled on spring roller cages, and optical
scales. The movement accuracy of both X and Z axes
is guaranteed through the use of stable granite
supporting surfaces. The spindle body on the machine
base limits run-out error to less than 2µm. A radial
rotation spindle brake eliminates the error of
rotational axis misalignment. Also ensuring
accuracy, 1µm resolution optical scales detect
interference produced by part movement through the
use of a glass ruler attached to the fixed part of
the machine.
Lyndex-Nikken,
Contour, roughness measurement
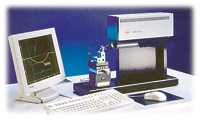 The MarSurf LD 120 gage measures
contour and roughness in a single stroke. Using a
single drive unit and a laser interferometer in the
gage to improve the range and accuracy of
measurements, the LS 120 has a traversing length of
up to 120 mm. The unit is an extension of Mahr"s
Perthometer Concept for measuring and analyzing
surface and form parameters both in the lab and on
the shop floor. Using triangular support design, the
LD 120 also incorporates an innovative tracing arm,
ensuring rigidity, low-oscillation measurements, and
precision. Magnetic tracing arm mounts provide
protection from accidental jarring.
Mahr Federal Inc.,
Thickness measurement
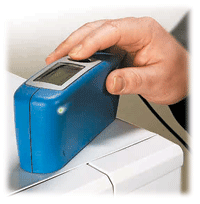 The new micro-TRI-gloss µ is for
quality control of paint and coatings. Gloss and
thickness are important criteria to guarantee an
efficient paint process. The combination of gloss
and thickness in one instrument is ideal for
measurement in the field and at the plant. The
built-in "dual sensor" measures the thickness of a
coating on ferrous and non-ferrous substrates. The
three angle geometry (20 degree, 60 degree, 85
degree) allows the measurement of any gloss level
from matte to high gloss surfaces. The new
auto-diagnosis feature in the protective holder
checks the calibration values and tells when to
calibrate.
BYK-Gardner
USA,
Laser sensor head
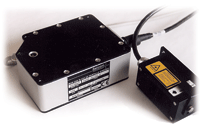 The Selcom SLS 2401
single-point gaging sensor head is for applications
with a limited work envelope requiring a faster
sampling rate and higher resolution and speed
profiles. A visible laser diode allows for easy
setup. Applications include in-line thickness
measurement and profiling, width measurement,
production line behavior versus speed, and
inspection of the finished product. The sensor head
has a stand-off distance of 50 mm or 80 mm depending
on the model and a measuring range of 20 mm or 50
mm. Accuracy is ±0.1 of the measurement range.
LMI
Technologies USA Inc.,
Laser alignment
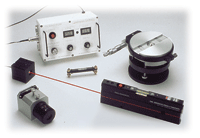 The 2-axis Microgage Alignment Kit
checks roll and web lines, CNC cutting and milling
tools, lathes, stamping presses, injection molding
machines, extrusion systems, and other equipment.
The kit combines a compact laser transmitter with a
digital receiver and display. As the laser moves
across the receiver in a vertical or horizontal
direction, the display provides a readout of the
motion, accurate to 0.001". The kit includes a
swiveling base for the laser to check the flatness
of rolls, machine beds, engine mounts, moving
slides, linear stages, and other flat surfaces. A
90-degree laser beam bender forms a perfect right
angle for checking machine tool alignment.
Pinpoint Laser Systems,
Optical micrometer

The 8400K digital optical micrometer measures the
vertical depth of surface features to evaluate the
severity of mechanical damage such as scratches,
corrosion pits, or blemishes. The sealed,
non-magnetic case is dustproof and shock-resistant
to withstand everyday shop use. The hardwood
instrument case also contains adapters and lenses
for use on convex, concave, or any combination of
these surfaces. The digital display has an RS232
serial port for data export to the included
processor/printer.
Paul N. Gardner Company Inc.,
Electronic calipers
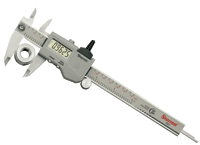 The 797 Electronic
Caliper Series offers IP65 level protection, which
is ideal for harsh manufacturing environments.
Features include an easy-to-read LCD display with
0.310" high characters, zero at any position,
instant inch/millimeter conversion, manual on/off
with auto-off after four hours of non-use, and a
CR2032 battery with more than 3,500 continuous hours
of life. All 797 calipers include an RS232 output
port for collecting and outputting data to devices
such as Starrett 772 series advanced data collection
systems and Starrett 761 series data multiplexers.
Data can then be analyzed for statistical process
control.
The L.S.
Starrett Co.,
Camshaft inspection
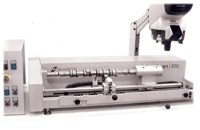 The CamScan 300 checks
the grinding or heat treatment quality of camshafts.
Load the camshaft onto the stand between centers,
move the sensor under the lobe, start the motorized
rotation, and view the quality of camshaft lobe
surfaces on the Rollscan or ViewScan software
window. To take a closer look at the part, stop the
Rollscan measurement and slide the microscope over
the camshaft.
American
Stress Technologies,